Mastodon Mastodon
military_working_dog_teams

Visiting America’s most obscure National Monument

Yesterday I visited one of the most obscure national monuments in the nation: the Military Working Dog Teams National Monument, located on the grounds of Lackland Air Force Base in San Antonio, Texas.

The national monument—which is best described as a national memorial—is the only one managed by the Department of Defense (in conjunction with the Airmen Heritage Foundation) and one of only two Treasured Places that are located on an active military installation (the other is Port Chicago Naval Magazine National Memorial).

While the national monument was designated as a rider in the FY2008 Defense appropriations bill, it wasn’t opened to the public until late 2013. Well, open to the members of the public that can pass a background check and obtain a visitor pass from the military base, at least. Luckily, there’s a law that allows for reasonable public access for visitors—and their dogs—to the national monument. That said, you’ll want to give yourself some extra time to wait for the required background check before you can gain access to the site.

A “daytrip” to San Antonio

As one of the most obscure national monuments in the country—and with my travel focused on completing my National Parks quest—I didn’t have it on my radar until I decided to tackle the Treasured Places list. So I really kicked myself for not having included it the last three times we were recently in the San Antonio area.

Side view of the main bronze sculptures with the Not Forgotten Fountain at the far left.

As the second-from-last Treasured Place I needed to visit to finish, and with a deadline to finish approaching, I needed to get there soon. After weighing the options of driving versus flying, it become obvious that it would be a lot cheaper, and much quicker, to fly. So I booked the cheapest ticket I could find to fly from Phoenix to San Antonio, along with the cheapest return ticket I could find for later the same day. I would be taking a “daytrip” to San Antonio, just to finish this one weird little national monument.

Visiting the National Monument

This is definitely one of the more unusual national monuments you’ll visit. While it’s less than a mile to the memorial site from the Valley Hi entrance to Lackland AFB, you’ll need to spend some time in the “Visitor Center” to receive your visitor pass. Make sure you bring your drivers license and don’t have any warrants. Once through the front gate, it’s a quick drive to the parking area and an equally short walk to the site itself. And, truth be told, it’s also a relatively quick site to visit. You’ll need just a few minutes to experience everything this national monument has to offer.

The main bronze sculptures are on a granite platform showcasing a soldier flanked by four different breeds of military dogs, which is shadowed by a large granite wall. On one side of the wall is some descriptive text, while the backside features photos of military dogs in combat action. But the highlight of the site is tucked into a corner of the 3000-square foot plaza. Named the Not Forgotten Fountain, it depicts a Vietnam soldier pouring water from his canteen into his helmet to create a water dish for his dog—a moving tribute.

While the Military Working Dog Teams National Monument isn’t likely to top anyone’s “Must Visit” list, it’s still a simple but well done memorial to an interesting subject. I hadn’t really considered the role that dogs had played in military actions. And if you love dogs, you’ll have a hard time not spending a few contemplative moments at the fountain.

A few final thoughts

First, it’s a bit weird to fly to another city only to return a few hours later. I’m used to only having carry-ons for most of my trips, but it’s weird when you bring the smallest backpack you own and it’s still essentially empty. I could have literally just carried everything I brought with me in my hands.

Similarly, I was asked several times by random strangers what brought me to San Antonio. I can’t imagine what went through their heads when I answered that I had flown in specifically to see the Military Working Dog Teams National Monument. I am 100% certain that no one besides the guards at Lackland had ever heard of it before, but I got absolutely zero follow up questions. Answering that question was a total conversation killer.

I would have been pretty disappointed had this been the last site I needed to visit to complete the Treasured Places list. No offense, but yeah…it’s just a memorial. But luckily, I had saved one spot I had been wanting to visit for well over a decade—a place I’ll visit next week!

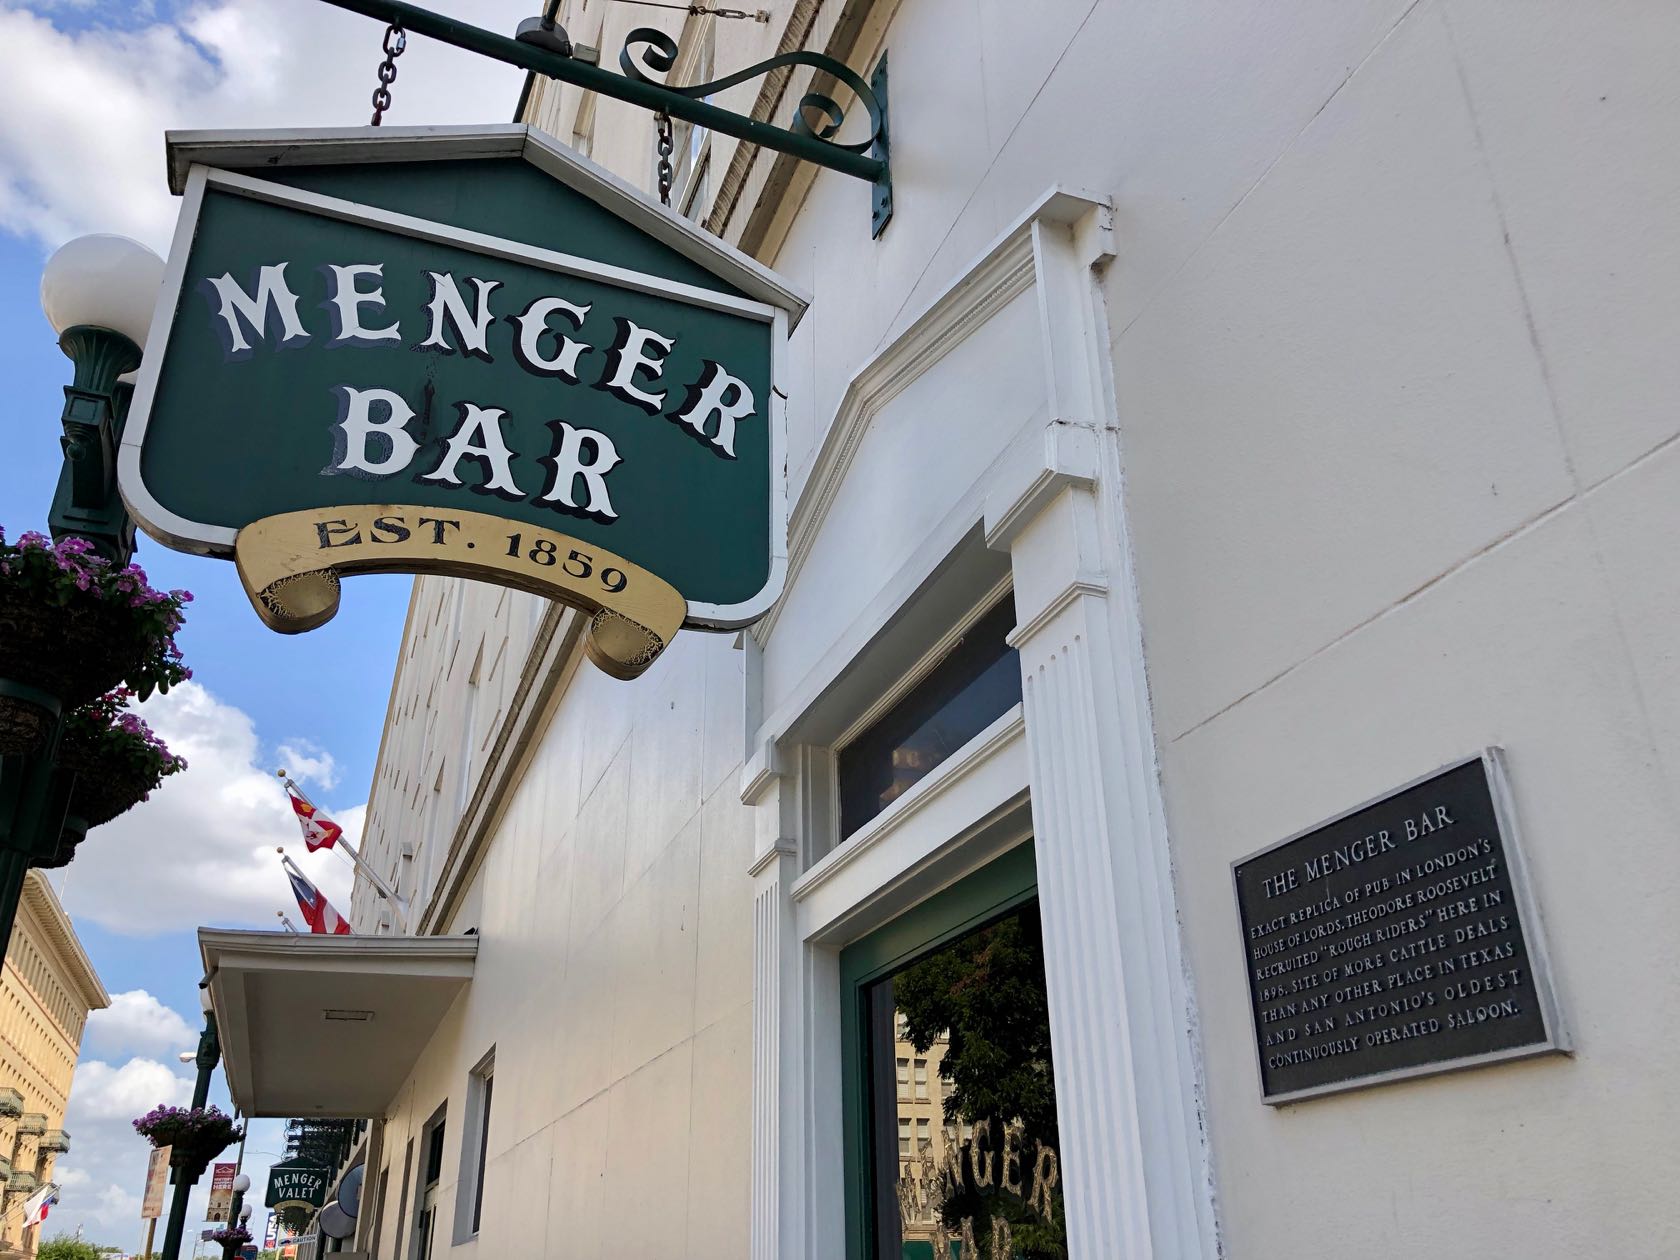
Having already visited San Antonio a number of times, and without much time to explore beyond the city, I made just a few stops. After lunch and beverages at Blue Star Brewing, I visited Menger Bar (one of the oldest bars in Texas—and where Teddy Roosevelt recruited Rough Riders). I then made a quick stop at San Pedro Springs Park, the second oldest park in the US and the origin site for the settlement that became San Antonio. From there it was back to the airport to fly home!

If you missed the short video of the National Monument above, scroll back up and check it out.

Thank you for visiting

My Submissions for the 2018 #FindYourPark Photo Challenge

This annual photo challenge, organized by the good folks at Nature Tech Family, is an excellent excuse to look back over the year you’ve had in our national parks and public lands. It’s also a great way to see what others have done this year. The rules are simple. For the last 10 days of … Read more

island view

Our visit to American Samoa

Our December 2018 trip to the island of Tutuila in American Samoa—plus photos, tips for visiting, and notes from our visit to National Park of American Samoa.

Exploring the Sears Point petroglyph site

“Hmm. Are you sure it’s out here?” she asked.

To be honest, it didn’t look very promising, at least not yet.

“Yep, it’s up ahead a few more miles,” I responded, in a tone that likely overstated my own confidence.

We had already driven an hour from Phoenix to Gila Bend, then another hour west along Interstate 8, then turned off at an exit to seemingly nowhere, jogged back east a mile along the access road, then turned north on an unremarkable dirt road impossibly named Avenue 76½ E. Along this rough-at-times road, we had passed two desert squatter communities, an out-of-place boat shipwrecked on the top of a small hill, and miles of seemingly barren desert.

Some skepticism was probably to be expected. After all, I hadn’t exactly explained where we were going; I had just said that we’d find some rock art when we got there.

As it turns out, we were indeed on the correct road. A few miles further ahead was the Sears Point petroglyph site, an array of prehistoric and historic petroglyphs carved into a basalt ridge overlooking the floodplain of the once mighty Gila River. This is BLM land, a site well known by those who hunt rock art, but not a destination where you’ll find many tourists.

Finally, the road crested a small ridge, dipped towards the dry riverbed in the distance, and we could see our destination ahead. Ribbons of sandy driving routes spiderwebbed around tamarisk and mesquite clumps that dotted the lowland. I was glad to have my Subaru as we sloshed through deep pockets of sand and gravel, maintaining enough speed around the corners to avoid getting stuck. And just like that, we arrived at a patch of dirt sporting two informational kiosks and some carsonite signs indicating the road’s end. We parked, stepped out of the subie, and immediately scanned the butte for the first sign of rock art.

“There’s some over there,” I said, nearly in code, and pointed towards a prominent panel gazing down upon us.

We grabbed some cold water from the cooler, donned our daypacks, and scrambled up towards the first panel with cameras in hand. And so began our rather impromptu visit to Sears Point.

The Sears Point petroglyph site

Archaeologists consider Sears Point to be one of the most significant rock art sites in the Southwest. In addition to more than 2,000 rock art panels incorporating nearly 10,000 petroglyph elements, the area contains a number of geoglyphs and other archaeological and historical features.

Simply put, there’s a lot to see out here. And you’ll need to do some exploring to see it.

Sears Point is just one of several other similar sites along the Gila River, including Quail Point, Hummingbird Point, and Oatman Point just a bit upstream. The only site signed from the interstate is Painted Rock, a now-defunct state park that’s since reverted to BLM management. I won’t get into what you’ll find at each of these sites, how to get to them, or what makes them special, but a quick google search will answer most questions one would have.

It’s important to note that while Sears Point is a named archaeological district, and is listed on the National Register of Historic Places, and is managed as an Area of Critical Environmental Concern by BLM, sadly none of these adds sufficient protection for this site or its neighboring ones.

The campaign to protect the Great Bend of the Gila

As a result, several organizations—led by Archaeology Southwest and the National Trust for Historic Preservation—have been campaigning to protect Sears Point and other important archaeological and historical sites upstream as the Great Bend of the Gila National Monument. It’s a good idea and the cultural resources here are definitely worthy of such a designation.

The short video below explains a bit more about the cultural heritage this campaign seeks to protect.

Some tips if you plan on visiting

  • You’ll want an AWD or 4WD vehicle to drive to the parking area, though don’t attempt it if it’s rained recently. You could probably make the drive with a 2WD high clearance vehicle if you stopped short of the deepest sand, which starts around here, roughly a mile from the main petroglyph panels. Either way, be prepared to extricate yourself if you get stuck no matter what you’re driving.
  • Don’t go in the summer heat, and be prepared with water and shade. You’ll spend your entire visit scrambling over rocks while the sun beats relentlessly down on you, so please act accordingly. If it’s warm out, you might want to consider gloves to protect your hands from hot rocks.
  • If you don’t have much time, check out the rock art panels near the top of the butte to the right. The largest panels and most easily accessible glyphs are found in that area, which will require some scrambling to get up to the faint trail that connects them. If you can, spend some time exploring the entire area, including the tops of the basalt mesas—there are thousands of petroglyphs, geoglyphs, rock alignments, and other artifacts in walking distance of your car. Stay alert to your surroundings and bring a gps to help you find your way back.
  • Photographing sometimes faint petroglyphs on shiny basalt in the glaring sun can be a challenge, so keep this in mind as you plan your arrival and departure times. A circular polarizing filter can also be helpful in reducing shine and helping the rock art stand out better. An umbrella can both help keep you cool and shade smaller glyphs for better photographs. I wish I had considered these things before my visit.
  • Practice Leave No Trace principles, and don’t touch the petroglyphs or do anything else that might impact the site. Once damaged, we can never get these resources back.
  • Want to learn more about lesser-known archaeological sites the public hasn’t ever heard of? Here’s the very best way to do that.
  • Do some research before you go, especially on other nearby sites, if you’d like to make a longer day out of it. There are many accessible places to explore in the surrounding area and within the Great Bend of the Gila proposal area.
This entire region of Arizona is worth exploring—and protecting. Sears Point is located near the far western end of the proposed national monument.

How to get there

From Gila Bend, Arizona, drive west on I-8 towards Yuma for roughly 30 mins to exit 78, Spot Road. At the end of the off ramp, turn north and then right on the frontage road. Head back east for about 1 mile to Avenue 76½E, then go north along the dirt road for about 7 miles. When you hit the sandy wash, stay on the most used route and aim for the low buttes to the west. You’ll find a small dirt parking area and two kiosks; park here and explore the area on foot.

Campsite 12 at Kodachrome Basin State Park

Sometimes, you find yourself in a really great campsite. Last weekend was one of those instances.

While we often disperse camp on BLM or National Forest lands, we had decided to reserve campsites last weekend, given our rather aggressive itinerary. Kodachrome Basin State Park seemed like the natural first night’s stop, since we’d be driving Cottonwood Canyon north through the middle of famed Grand Staircase-Escalante National Monument. We selected site 12 from the available options, and it did not disappoint.

What makes a good campsite?

For me, there are a few things that I tend to prefer in campsites. Please note that I’m referring to developed campgrounds here—not dispersed or backcountry sites, which I’d evaluate using much different criteria.

First, I prefer small to medium-sized campgrounds, usually between about 15-40 sites. Larger campgrounds tend to have very small sites that feel nearly on top of each other, and tend to be more crowded to begin with (hence, their large capacity). Extremely small ones often lack useful amenities, like flush toilets and sinks. Don’t get me wrong, I’m fine using vault toilets and otherwise roughing it. But if I’m paying $15-30 for a place to sleep for the night, I expect a few additional conveniences. It’s often nice to have showers too, especially if you’ve been outside all day. I tend to sleep better when I feel clean. I don’t rely on firewood being available for purchase at the campground, but it’s always nice to have as a backup or supplemental option.

While campgrounds can sometimes be a fun social experience, I usually prefer more privacy. So I look for sites along the outer loops and especially those that have a visual barrier between my site and neighboring ones. Shade can be an important factor too, especially here in the desert southwest, so some tree cover or a shade structure is often appreciated.

I usually don’t care much about distance to the restrooms or water spigots; neither is usually too far way to cause much hassle. However, the inverse isn’t true—proximity to the restrooms or water can mean a constant stream of visitors passing by your tent. Worse, occasional whiffs of an overly ripe vault toilet can really ruin the camping mood.

If you’re tenting it as I often am, a flat tent pad that’s not too rocky is key. After that, it’s all bonus. Being a westerner, I have a relatively high expectation that really good campsites should offer some sort of expansive or scenic views, too. Proximity to streams or lakes is usually nice as well, though sometimes that means more bugs or higher winds.

Evaluating campsite 12 at Basin Campground

On par, campsite 12 was nearly perfect for our needs last weekend. The campground is the perfect size, and offered just the right amenities. The restrooms were clean and modern, and the shower stalls were spacious. While there wasn’t any way to adjust the shower temperature, it was exactly the right temp for me. In addition, a sink for washing dishes and a self-serve supply of firewood—a handy to carry bundle for just $5, with proceeds benefitting the Boy Scouts—were appreciated conveniences.

The site is well isolated from neighbors with its own mini loop, making it feel like you were alone. Due to the configuration of the campsites, all RVs were on the other side of the campground. Best of all, it was at the far end of the campground near the head of the basin, making for some excellent panoramic views. We’ll be back the next time we find ourselves looking for a campground in the area.

If you go

There are multiple campgrounds atat Kodachrome Basin State Park, but the one you’re looking for is the largest one, Basin Campground. Campsites are $20 per night, plus an $8 registration fee. Check availability on site 12; if it’s already taken, there seemed to be several other sites that looked like quality backup choices. Not all sites are reservable online, so you might be able to snag one on a first come, first served basis, too.

pando

Meet Pando, the world’s oldest living organism

Just outside of Fish Lake, Utah lies a beautiful stand of quaking aspen. But this isn’t just your average aspen forest.

Meet Pando

It’s been named Pando, or alternatively, The Trembling Giant. Scientists believe that this stand of aspen is actually just a single living organism. Each of the approximately 47,000 ordinary looking aspens growing over 106 acres is genetically identical to one another and shares the same root system. It’s estimated to be an astounding 80,000 years old, making it the oldest known organism on Earth. Pando is also believed to be the most massive living thing, too.

A single organism

Like creosote, aspens are clonal plants that can reproduce vegetatively (as well as sexually) from a single individual. What appear to be separate trees are actually stems growing from the lateral roots of a single individual tree. Each new tree shares the same dna and remains connected via the root system, even sharing nutrients and possibly disease. Over time, this single organism can continue to spread and grow, even as particular stems die off. In this way, the organism seems to repeatedly cheat death.

Is Pando dying?

Unfortunately, Pando doesn’t seem to be regenerating new trees to replace the ones that die off. Efforts are underway to study the problem, which includes fencing off several monitoring plots as well as treating plots with understory fire and canopy thinning.

pando sign

Visiting Pando

Unlike other famously-old trees, Pando’s location is well known and easy to access. The grove is located in the Fishlake National Forest in Utah about one mile south of Fish Lake and is bisected by Highway 25. You can easily find it on google maps. As mentioned above, parts of the forest have been fenced off and aren’t accessible. But there’s plenty of Pando otherwise accessible to visitors, including a section of it containing a campground.

pando

Your Pando “moment of zen”

Kayaking the Blue Ridge Reservoir

FR751 from Red Rock Crossing campground to Blue Ridge Reservoir (aka C.C. Cragin) will be closed from September 10, 2018 until April 2019. For more info, call Mogollon Rim Ranger District at 928-477-2255.

Look on most maps of the Mogollon Rim region of Arizona and you’ll have trouble finding a label for Blue Ridge Reservoir, one of the nicer lakes in Arizona to kayak. Instead, you’ll run across a far less glamorous name, the C.C. Cragin Reservoir. This gorgeous narrow lake is located about 25 miles north of Payson, but only came into being because of water needs 200 miles away.

The lake that copper built

In the early 1960s, Phelps Dodge was looking for water to service its huge mining operation in Morenci. The most obvious source was the nearby Black River, but its water rights were tied up by the Salt River Project, better known as SRP. Phelps Dodge and SRP found a solution in a water trade. SRP would allow Phelps Dodge to use water from the Black River if the mining company delivered the same amount of water from outside SRP’s existing service area. A site on the Mogollon Rim was selected to complete the deal.

By 1965, Phelps Dodge had constructed a dam on East Clear Creek an hour’s drive north of Payson. The resulting reservoir—originally named Blue Ridge—held only 15,000 acre feet of water, but was surprising reliable given its location atop the Mogollon Rim. The project included an 11-mile long pipeline to deliver the water down the rim to the East Verde River, which eventually flows into SRP’s reservoir system. It was an exchange that served both parties well for decades to come.

Blue Ridge Reservoir

How ‘Blue Ridge Reservoir’ became ‘CC Cragin Reservoir’

More than 40 years later, the Arizona Water Settlement Act of 2004 changed the name of the dam and reservoir to honor C. C. Cragin, a former SRP superintendent that helped greatly expand the system of dams along the Salt River east of metro Phoenix. The following year, Phelps Dodge handed over the reservoir to SRP, who now provides water to Payson and surrounding communities.

What’s it like to kayak here?

Blue Ridge Reservoir is definitely a favorite of many kayakers in the state. The narrow, intimate lake is flanked by relatively steep pine-covered slopes, so it feels more like you’re paddling a slow moving river than a broad lake. It’s easy to feel like you’re the only boat on the water here, as the lake curves around multiple bends just as a river does, obscuring other paddlers. With a treeline that comes right down to a 15 mile-long shoreline, the lake offers many opportunities to dock and enjoy a snack under the shade of the cool pines. Craggy rock outcroppings abound at the water’s edge, offering plenty of geologic eye-candy while you paddle past.

The lake is split between two arms. The western arm is much longer, while the southern arm includes the interesting curved dam that holds the water back. At an elevation of 6700 ft, the paddling season runs from May through October. While small motorized boats are allowed, this isn’t a place where paddlers will feel overwhelmed by motors.

How to get there

Blue Ridge Reservoir is located about 45 miles north of Payson, a roughly 2-hour drive from Phoenix. From Payson, continue north on Highway 87 for roughly 40 miles to FR751, near milepost 295. You’ll see a large US Forest Service sign pointing the way to Blue Ridge Reservoir (as with most paddlers, the CC Cragin name hasn’t quite taken hold). Turn east on FR751 and follow it about 4 miles to the boat ramp.

Parking at Blue Ridge Reservoir

Blue_Ridge_Reservoir_parking

One of the appealing qualities of kayaking on the Blue Ridge is the narrow, river-like canyon of the reservoir. Unfortunately, the same narrow width applies to the approach road, boat launch, and available parking area. You won’t find a large paved parking lot capable of storing dozens of trailers here. Indeed, there are only a handful of legal spots clinging the guardrail near the top of the boat ramp loading area, with a small parking lot up the hill for the remainder of the vehicles. Parking is currently prohibited anywhere else along the road. In short, expect an uphill walk after your paddle to retrieve your vehicle. I recommend either arriving early in the morning or late in the day to claim a parking spot.

Camping near Blue Ridge Reservoir

The Rock Crossing Campground is just two miles from the reservoir boat launch, so it’s well placed for a weekend of boating. It’s a popular place during the summer months and no reservations are accepted, so you’ll want to have a backup plan in case it’s full. Blue Ridge Campground and Clints Well Campground are the next nearest options, each a 10 minute drive away.

In addition, dispersed camping is available throughout the surrounding national forest, so you shouldn’t be without some sort of campsite to call home for the night. There are a handful of spots that work for shoreline camping from your kayak or canoe, if you’re feeling adventurous.


Driving the Black Hills Back Country Byway

The Black Hills Back Country Byway runs 21 miles off US-191 between Clifton and Safford.

There it was—an obscure, thin black line on a map, a 21-mile dirt road shortcutting two sections of Hwy 191 along the eastern edge of Arizona: the Black Hills Back Country Byway. I had first noticed it when I was inspecting the map for the Gila Box Riparian National Conservation Area, one of the state’s many National Conservation Lands. The road subtly poked into the Gila Box, providing a popular put-in spot for rafters down the Gila River. I wasn’t here to raft the river though—at least, not yet anyway.

Arizona Highways had included the route in its listing of scenic drives in the state, so I had been attempting to work it into various trip itineraries for quite some time. On the return journey from southern New Mexico last weekend, I found my opportunity.

As we made our way north from the settlement known as “Three Way” [insert giggling], we wondered if the basalt-covered hillsides to the west were the black hills after which the road was named. We searched online for a detailed map of the backcountry byway, but—as is often the case these days—the BLM website was not forthcoming. After a bit of searching, we discovered that the ‘Guthrie’ and ‘Toll Gate Tank’ topo maps seemed most useful quads for navigating the route, and the Gila Box Riparian NCA map probably gives the best overview. Having a map isn’t essential to this endeavor, as the main roadway is well defined and the turnoffs are well signed, but it’s always a good idea when you’re traveling in the backcountry. While high clearance vehicles are recommended by BLM, I’d consider the road passable under dry conditions by most sedans. Nonetheless, this area is remote and you should be fully prepared with extra water and emergency gear before attempting this or any backcountry drive. Not including stops, you’ll need roughly 60-90 minutes to drive from end to end. You can access the Black Hills Back Country Byway off US Highway 191 near milepost 139 east of Safford and near milepost 160 south of Clifton. Both ends are well-signed and feature an informational kiosk a short distance up the road.

The Black Hills Back Country Byway isn’t a knock-your-socks-off scenic drive, but it is definitely a worthy detour if you’re passing through the area.

The byway follows the old road between Safford and Morenci built in the 1930s. There are a handful of interpretive sites and picnic areas along the way, as well as access to several rugged roads penetrating more remote areas. One of those side roads accesses the Black Hills Rockhound Area, where you can try your luck at taking some gems home. You’ll also cross the historic Old Safford Bridge over the Gila River (built in 1918 and listed on National Register of Historic Places, but more recently renovated), which offers a great spot to stop and enjoy the river and the resulting shade. The 7-site Owl Creek Campground is on a bluff overlooking the bridge and riverway for those who want a longer experience.

The Black Hills Back Country Byway isn’t a knock-your-socks-off scenic drive, but it is definitely a worthy detour if you’re passing through the area. It’s a rather pleasant drive through the backcountry of southeastern Arizona. The view from the Canyon Overlook Picnic Area overlooking the surrounding topography with Mt Graham looming in the distance is definitely camera-worthy. And the thin ribbon of lush green riparian vegetation along the Gila River also begs for an extended stop. The scenic drive would be a perfect compliment to any journey down the famed Coronado Trail.

Walking behind a waterfall at Horseshoe Dam

Overview

Located just outside the metro Phoenix area, there’s a surprisingly cool waterfall that flows during the rare occasions when water is being released from Horseshoe Reservoir. The best part of this easy-to-get-to adventure is that you can walk behind the waterfall along a concrete walkway.

When to go

The “waterfall” only occurs when water is being released from Horseshoe Reservoir, one of several dams storing and delivering water to metro Phoenix. Unfortunately, large releases from Horseshoe Dam aren’t that common, usually only occurring during wet periods when the system can’t safely store any additional water.

That means that you’ll need to pay close attention to conditions to catch it at the right time. If you see someone post a video or photo of the waterfall running, I’d hop on the chance to get there.

Your best bet is to check the SRP daily water report when you think there might be a release happening. Select today’s date and look for the Reservoir Release section about halfway down. If you don’t see Horseshoe Reservoir listed (it’s currently highlighted in a little yellow box below the section), then you’re out of luck. As you can see from this screenshot, the release was 425 cfs in the photos and videos you see here.

Getting there

The parking area is located about 24 miles from Carefree, Arizona. The road is about half paved and half good gravel or dirt. There are numerous potholes that blend in with the dirt, so pay attention and take it slow. If you’re careful, you can make it in a sedan, though you’d probably be more comfortable in an SUV. There is one short section—maybe 20 yards long—that is quite rocky; be sure you go slowly over this section in particular.

Starting at the corner of Tom Darlington (Scottsdale Rd) and Cave Creek Rd in the town of Carefree, head east for a little over 6 miles. Turn right onto Bartlett Dam Road/FR205; you’ll see signs for a ranger station and Bartlett Dam. You’ll take this road for 6.25 miles until you see a well-signed road heading left (north) for Horseshoe Reservoir. Turn left onto this road and follow it for 10.5 miles.

You’ll then want to turn right onto a well-maintained road signed for Horseshoe Dam Vista. Follow that for nearly half a mile until you reach the parking area. From the parking area, you’ll be faced with two roads in front of you. The one on the right goes to a great viewpoint of the dam and the waterfall. The one on the left goes to a higher viewpoint, and is where you access the walkway behind the waterfall.

I’ve embedded a google map below with the route and some points of interest. You can clearly see the parking area and the viewpoints you’ll want to see. You can even open this map using the Google Maps app on your phone to follow along.

Do you need a Tonto Pass?

Along the way, you’ll see many signs telling you that you need a Tonto Pass. Sadly, an “interagency” pass, such as the America the Beautiful pass, does not count—that pass doesn’t cover areas with “enhanced amenities,” which is how Tonto National Forest gets away with not accepting the interagency pass. If this frustrates you as much as it does me, check out this organization that’s leading the fight against additional fees.

The area that you’ll be parking in does not have the elements required by law to qualify as an enhanced amenity area, but Tonto National Forest may disagree and ticket you anyway if you don’t have one. I keep an unused one in my vehicle, so I often play-it-by-ear when I’m in an area that doesn’t seem to qualify but is signed inappropriately. This is your decision, not mine, so don’t blame me if you get a ticket.

What you’ll see

I suggest starting with the viewpoint found on the road to the right from the parking area (point 3 on the map). This is the best view from this side and gives you a good overview of the scene.

From there, you can backtrack to the parking area and take the higher road on the left, or find one of the paths that leads up the slope to the higher road  near where you’re already at. From that viewpoint (point 5), you can clearly see the entrance to the walkway in front of you.

Once you’re behind the falls, watch where you’re walking—the footbed turns to gravel and puddles about halfway through. It’s pretty relaxing to stare out as the water falls down in front you, separated into streams by debris barriers above you. The roar of the water is quite loud, and there’s quite a bit of mist and some water dripping too.

Keeping walking and you’ll find yourself on the other side of the dam. There’s a sloping path up (point 6)  to a viewpoint (point 7) that provides an interesting perspective looking back towards where you started. There are a number of cascades and smaller falls facing you, as the water finds its way down to the river channel below.

From here, you can make your way down the slope closer to the water for a slightly different view. Be careful, it’s a steep slope that can get wet and slippery from the mist.

You can also make your way back towards the damn, arriving just below the walkway right where the water falls onto bare rock (point 8). The force of the water is very apparently from this vantage point.

When you’re done exploring, head back the way you came—back up the slope, across the walkway, and back to the original vista point.

For an additional view of the runoff, follow the very rough road downstream that leads you to Fishermans Point. From here, you can wander out onto the rocks (point 9) for a good water-level view up towards the dam.

Before you head back to the city, you might want to explore more around this gorgeous area.

If you found this guide useful, please do me a favor and share this on social media or send the link to a friend. I appreciate it!